MRI Pancreas
Indications for pancreas mri scan
- Characterization of suspected parenchymal abnormalities found on CT or ultrasound
- Detection of small non-organ-deforming pancreatic ductal adenocarcinomas
- Evaluation of acute and chronic pancreatitis when CT is not diagnostic
- Detection of choledocholithiasis as a cause of acute pancreatitis
- Detection of intraluminal pancreatic duct calculi
- Detection and staging of pancreatic neoplasms
- Characterization of cystic pancreatic lesions
- Detection of endocrine tumours
- Pancreatic cancer
- Pancreas divisum
Anatomy of pancreas
The pancreas is a glandular organ located in the abdomen, nestled behind the stomach. It plays a crucial role in the digestive and endocrine systems. Structurally, the pancreas can be divided into three main regions: the head, body, and tail. The head of the pancreas lies on the right side, connected to the duodenum, while the body extends towards the left and ends in the tail. The pancreas is composed of exocrine and endocrine cells. Exocrine cells secrete digestive enzymes into the pancreatic ducts, which eventually merge with the common bile duct to enter the duodenum. The endocrine cells are clustered in small groups called islets of Langerhans and produce hormones such as insulin and glucagon, regulating blood sugar levels. The intricate anatomy of the pancreas facilitates its crucial functions in digestion and hormonal regulation within the body.

Contraindications
- Any electrically, magnetically or mechanically activated implant (e.g. cardiac pacemaker, insulin pump biostimulator, neurostimulator, cochlear implant, and hearing aids)
- Intracranial aneurysm clips (unless made of titanium)
- Pregnancy (risk vs benefit ratio to be assessed)
- Ferromagnetic surgical clips or staples
- Metallic foreign body in the eye
- Metal shrapnel or bullet
Patient preparation for MRI Pancreas
- A satisfactory written consent form must be taken from the patient before entering the scanner room
- Ask the patient to remove all metal objects including keys, coins, wallet, cards with magnetic strips, jewellery, hearing aid and hairpins
- Ask the patient to undress and change into a hospital gown
- Instruct the patient to hold their breath for the breath hold scans and breathe gently for the gated scans (its advisable to coach the patient two to three times before starting the scan)
- An intravenous line must be placed with extension tubing extending out of the magnetic bore
- Claustrophobic patients may be accompanied into the scanner room e.g. by staff member or relative with proper safety screening
- Offer headphones for communicating with the patient and ear protection
- Explain the procedure to the patient and answer questions
- Note down the weight of the patient
Positioning for MRI Pancreas
- Position the patient in supine position with head pointing towards the magnet (head first supine)
- Position the patient over the spine coil and place the body coil over the upper abdomen (nipple down to iliac crest)
- Securely tighten the body coil using straps to prevent respiratory artefacts
- Give a pillow under the head and cushions under the legs for extra comfort
- Centre the laser beam localizer over xiphoid process of sternum

Recommended MRI Pancreas Protocols, Parameters, and Planning
MRI Pancreas Localiser
To localize and plan the sequences, it is essential to acquire a three-plane T2 HASTE localizer initially. These fast single-shot localizers have an acquisition time of under 25 seconds and are highly effective in accurately localizing abdominal structures.
T2 HASTE coronal 4mm sfov
Plan the coronal slices using the axial localizer and position the block horizontally across the abdomen as shown. Verify the position in the other two planes. Establish an appropriate angle in the sagittal plane, aligning it vertically across the abdomen. Ensure that the slices adequately cover the entire pancreas, extending from the anterior abdominal wall to the vertebral body. The phase direction should be from right to left to minimize ghosting artifacts from the lungs and heart. Employ phase oversampling to prevent wrap-around artifacts. Additionally, consider adding saturation bands at the top and bottom of the block to minimize artifacts caused by fat signal, arterial pulsation, and breathing. Instruct the patient to hold their breath during image acquisition. (In our department, we typically advise patients to take two deep breaths before instructing them to “take a deep breath and hold”.)

Parameters
TR 2000-2500 | TE 90-110 | FLIP 130 | NEX 1 | SLICE 4MM | MATRIX 256×256 | FOV 280 | PHASE R>L | OVERSAMPLE 50% | TRIGGER NO |
T1 VIBE dixon coronal 3mm sfov
Plan the coronal slices using the axial localizer and position the block horizontally across the abdomen as shown. Verify the position in the other two planes. Establish an appropriate angle in the sagittal plane, aligning it vertically across the abdomen. Ensure that the slices adequately cover the entire pancreas, extending from the anterior abdominal wall to the vertebral body. The phase direction should be from right to left to minimize ghosting artifacts from the lungs and heart. Employ phase oversampling to prevent wrap-around artifacts. Additionally, consider adding saturation bands at the top and bottom of the block to minimize artifacts caused by fat signal, arterial pulsation, and breathing. Instruct the patient to hold their breath during image acquisition.

Parameters
TR 6-7 | TE 2.39 4.77 | FLIP 10 | NXA 1 | SLICE 3 MM | MATRIX 288×256 | FOV 280 | PHASE A>P | OVERSAMPLE 20% | BH YES |
Small FOV T2 tse\HASTE breath hold 3mm
Plan the axial slices on the coronal breath-hold images and position the block horizontally across the abdomen as shown. Verify the positioning in the other two planes. Establish an appropriate angle in the sagittal plane, aligning it horizontally across the abdomen. The slices must be sufficient to cover the entire pancreas, starting one inch above the pancreatic tail and extending down to the C loop of the duodenum. The phase direction should be from right to left to minimize ghosting artifacts from the anterior abdominal wall. Use phase oversampling to prevent wrap-around artifacts. Consider adding saturation bands at the top and bottom of the block to minimize artifacts caused by fat signal, arterial pulsation, and breathing. Instruct the patient to hold their breath during image acquisition.

Note:Scans achieve better results when performed with a right-to-left phase direction and 70% oversampling. This choice is made to prevent artifacts caused by motion of the abdominal wall fat. However, in most scanners, implementing this option is not feasible due to the additional oversampling, which would extend the breath-hold time beyond what patients can manage. As a result, we conduct the scan with an anterior-posterior phase direction on our 1.5T scanner and right-to-left on our 3T scanner. If TSE images exhibit excessive artifacts, consider utilizing a HASTE sequence.
Parameters
TR 4000-5000 | TE 90 | FLIP 150 | NEX 1 | SLICE 3MM | MATRIX 256×224 | FOV 250 | PHASE A>P | OVERSAMPLE 30% | IPAT ON |
Small FOV T2 tse\HASTE fat saturated breath hold 3mm
Plan the axial slices on the coronal breath-hold images and position the block horizontally across the abdomen as shown. Verify the positioning in the other two planes. Establish an appropriate angle in the sagittal plane, aligning it horizontally across the abdomen. The slices must be sufficient to cover the entire pancreas, starting one inch above the pancreatic tail and extending down to the C loop of the duodenum. The phase direction should be from right to left to minimize ghosting artifacts from the anterior abdominal wall. Use phase oversampling to prevent wrap-around artifacts. Consider adding saturation bands at the top and bottom of the block to minimize artifacts caused by fat signal, arterial pulsation, and breathing. Instruct the patient to hold their breath during image acquisition.
Parameters
TR 5000-6000 | TE 90 | FLIP 150 | NEX 1 | SLICE 3MM | MATRIX 256×192 | FOV 250 | PHASE A>P | OVERSAMPLE 30% | IPAT ON |
T2 SPACE coronal 3D fat sat 1mm gated
Plan the coronal slices based on the axial images, angling the position parallel to the pancreatic body. Verify the position in the other two planes. Establish an appropriate angle in the sagittal plane, aligning it vertically across the abdomen. Ensure that the slices are sufficient to cover the entire pancreas from head to tail.
For respiratory gating scans, it is important to correctly position the respiratory navigator box. Place it in the middle of the right dome of the diaphragm, with half of the box over the right lobe of the liver (segment 8) and the other half over the lungs. Planning should be done using a non-breath-hold localizer, as the diaphragm will push down the liver during inhalation, leading to improper planning of slices and the respiratory navigator box.
It is important to instruct the patient to breathe gently throughout the sequence. The effectiveness of the navigator will be reduced with very shallow or erratic breathing.

Navigators:-
Recently, navigators have been introduced in order to enable motion-free scans of the abdomen and chest, eliminating the presence of artifacts caused by motion. A navigator is a periodic two-dimensional pulse that excites a group of spins, followed by a readout gradient along the long axis of the group to obtain a one-dimensional profile of the region of interest. This imaging sequence utilizes a low flip angle (10) to minimize signal saturation, and the abrupt change in signal intensity between the lungs and liver is utilized to determine the position of the diaphragm. The navigator pulse has a duration of approximately 20 milliseconds and is executed every 200 milliseconds. A scan acceptance window is determined based on preliminary pre-scan data, after which the actual scan acquisition begins. During each slice acquisition, the navigation box detects the position of the diaphragm, and imaging only takes place when the diaphragm falls within the acceptance window.
Parameters
TR 3000-4000 | TE 700 | FLIP 170 | NEX 1 | SLICE 1MM | MATRIX 256×256 | FOV 300 | PHASE R>L | OVERSAMPLE 100% | TRIGGER YES |
T1 VIBE DIXON 3mm axial BH pre GD(In-opposed phase and water sat)
Plan the axial slices on the coronal breath-hold images and position the block horizontally across the abdomen as shown. Verify the positioning in the other two planes. Establish an appropriate angle in the sagittal plane, aligning it horizontally across the abdomen. The slices must be sufficient to cover the entire pancreas, starting one inch above the pancreatic tail and extending down to the C loop of the duodenum. The phase direction should be from right to left to minimize ghosting artifacts from the anterior abdominal wall. Use phase oversampling to prevent wrap-around artifacts. Consider adding saturation bands at the top and bottom of the block to minimize artifacts caused by fat signal, arterial pulsation, and breathing. Instruct the patient to hold their breath during image acquisition.

Planning must be done in the breath hold HASTE coronal because the diaphragm will push down the upper abdominal organs during inhalation and change the position of pancreas from the initial localizer scans.

DIXON
DIXON MRI is a magnetic resonance imaging (MRI) technique that generates multiple types of tissue contrasts within a single image. It separates the signals from fat and water using a combination of imaging sequences and mathematical algorithms. By acquiring images with different echo times, DIXON MRI can produce various types of contrast, including in-phase, out-of-phase, fat-only, water-only, and combined fat-water images. The in-phase and out-of-phase images reveal subtle changes in fat-water ratios, while the fat-only and water-only images isolate the respective tissue components. Because DIXON produces three types of scans in one, there is no need to perform additional in and out-phase imaging.
Parameters
TR 6-7 | TE 2.39 4.77 | FLIP 10 | NXA 1 | SLICE 3 MM | MATRIX 288×256 | FOV 250-280 | PHASE A>P | OVERSAMPLE 20% | BH YES |
contrast administration and timing of scans
Guess timing technique:-
This is one of the simplest methods. It works by estimating the time it takes for contrast to travel from the site of injection to the vascular structures of the liver. This technique is highly dependent on factors such as the site of contrast injection, patient’s age, cardiac output, and vascular anatomy. Generally, it takes about 18-25 seconds for the contrast to travel from the antecubital vein to the abdominal aorta and 45-60 seconds to reach the portal veins. Therefore, the first acquisition of the dynamic sequence should begin within 20 seconds of contrast administration.
Care bolus technique:-
The care bolus technique is the most commonly used method for bolus detection. This technique involves employing a coronal fast gradient refocused sequence to obtain real-time images every second through the vascular structure of interest, typically positioned over the heart. By monitoring the arrival of the contrast bolus in the heart, the operator can then switch to the centric 3D dynamic sequence for further imaging.
Planning care bolus
Plan the coronal care bolus slice on the sagittal plane. Position the block over the mid-heart and angle the slice parallel to the ascending aorta. Verify the position in the other two planes. Determine the suitable angle in the axial plane, aligning it horizontally across the heart. To reduce artifacts caused by breathing and heart motion, utilize a saturation band on both sides of the block.

Care bolus scans should commence one second before contrast administration. The operator can then observe the scans in real-time and monitor the arrival of the contrast bolus in the heart. Once the contrast reaches the heart, the care bolus should be promptly halted, and the patient should be instructed to hold their breath before initiating the centric 3D dynamic sequence.

T1 VIBE dixon 3D fat sat axial breath hold dynamic 2 run post GD
Plan the axial slices on the coronal breath-hold images and position the block horizontally across the abdomen as shown. Verify the positioning in the other two planes. Establish an appropriate angle in the sagittal plane, aligning it horizontally across the abdomen. The slices must be sufficient to cover the entire pancreas, starting one inch above the pancreatic tail and extending down to the C loop of the duodenum. The phase direction should be from right to left to minimize ghosting artifacts from the anterior abdominal wall. Use phase oversampling to prevent wrap-around artifacts. Consider adding saturation bands at the top and bottom of the block to minimize artifacts caused by fat signal, arterial pulsation, and breathing. Instruct the patient to hold their breath during image acquisition.
A dynamic T1 VIBE DIXON 3D sequence comprises two VIBE 3mm 3D scans with a 15-second delay between the first and second acquisitions. The first scan captures the arterial phase, while the second scan captures the venous phase. The timing of each scan is crucial, particularly for the arterial and venous phases. A proper arterial phase acquisition should exhibit noticeable enhancement of the hepatic arteries, pancreas, and spleen, without any enhancement of the hepatic veins.
Parameters
TR 6-7 | TE 2.39 4.77 | FLIP 10 | NXA 1 | SLICE 3 MM | MATRIX 288×256 | FOV 250-280 | PHASE A>P | OVERSAMPLE 20% | BH YES |
T1 VIBE dixon coronal 3mm sfov post GD
Plan the coronal slices using the axial localizer and position the block horizontally across the abdomen as shown. Verify the position in the other two planes. Establish an appropriate angle in the sagittal plane, aligning it vertically across the abdomen. Ensure that the slices adequately cover the entire pancreas, extending from the anterior abdominal wall to the vertebral body. The phase direction should be from right to left to minimize ghosting artifacts from the lungs and heart. Employ phase oversampling to prevent wrap-around artifacts. Additionally, consider adding saturation bands at the top and bottom of the block to minimize artifacts caused by fat signal, arterial pulsation, and breathing. Instruct the patient to hold their breath during image acquisition.
Parameters
TR 6-7 | TE 2.39 4.77 | FLIP 10 | NXA 1 | SLICE 3 MM | MATRIX 288×256 | FOV 280 | PHASE A>P | OVERSAMPLE 20% | BH YES |
CLICK THE SEQUENCES BELOW TO CHECK THE SCANS
-
localizer_3 plane1
-
T2_TRUFI_CORONAL_LARG FOV_BREATH HOLD2
-
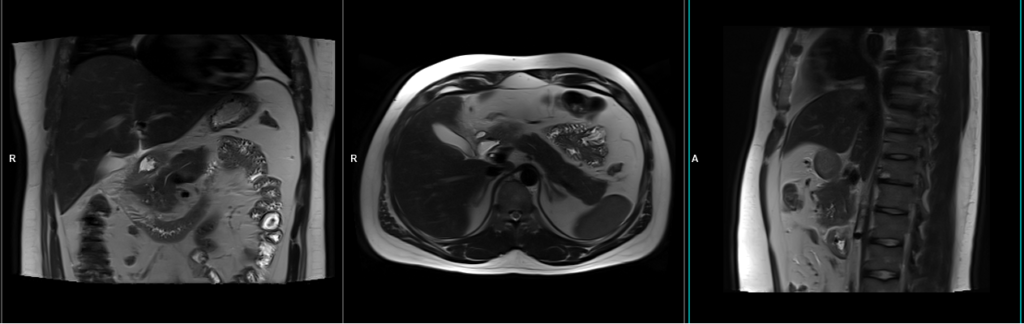
T1_VIBE_IN_OPPOSE_SFOV_AXIAL3
-
T2_TSE_AXIAL_SFOV_BREATH_HOLD4
-
T2_TSE_AXIAL_SFOV_FAT SAT_BREATH_HOLD5
-
T2_TSE 3D CORONAL 1MM GATED6
-
T1 VIBE FAT SAT_AXIAL_SFOV_PRE_GD7
-
CARE BOLUS

-
T1 VIBE FAT SAT_AXIAL_SFOV_POST_GD_DYNA8
-
T1 VIBE FAT SAT_AXIAL_SFOV_POST_GD_5MIN9