Secretin Stimulated MRCP (Planning and Protocols)
Indications for secretin stimulated MRCP
- Assessment of segmental stenosis of pancreatic duct in chronic pancreatitis
- Evaluation of leakage of pancreatic juice associated with acute pancreatitis
- Assessment of decreased exocrine reserve in chronic pancreatitis
- Screening for patients at high risk for pancreatic adenocarcinoma
- Evaluation of pancreatic Carcinoma
- Evaluation of papillary stenosis
- Evaluation of acute pancreatitis
- Evaluation of pancreas divisum
- Evaluation of santorinicele
- Evaluation of choledochocele
What is secretin?
Secretin, a vital hormone in digestive system regulation, is predominantly synthesized in the S cells of the duodenum, the initial part of the small intestine. Its release is triggered by the presence of acidic chyme, a partially digested food mix, entering the duodenum from the stomach.
The primary role of secretin is to stimulate the pancreas to secrete bicarbonate-rich pancreatic juice into the small intestine. This action helps neutralize the acidic chyme, creating an optimal environment for digestive enzymes to function efficiently. Furthermore, secretin inhibits gastric acid secretion from the stomach, further aiding in chyme neutralization.
In addition to its impact on the pancreas and stomach, secretin also influences other digestive organs. It promotes liver bile secretion, which facilitates fat digestion and absorption. Moreover, secretin enhances blood flow to the small intestine, facilitating nutrient delivery for effective digestion.
Why is secretin used in MRCP?
Secretin is used in MRCP (Magnetic Resonance Cholangiopancreatography) to enhance the visualization of the pancreatic and bile ducts. When secretin is administered during an MRCP procedure, it stimulates the secretion of pancreatic fluid and bile into the duodenum. This causes the ducts in the pancreas and biliary system to dilate, making them more visible on the MRI images. The increased fluid flow also helps to highlight any abnormalities or obstructions in the ducts, aiding in the diagnosis of conditions such as pancreatitis, pancreatic tumors, biliary strictures, or gallstones.
The administration of secretin during an MRCP typically involves an intravenous injection of the hormone. Following the injection, a series of MRI scans is performed to capture images of the pancreatic and bile ducts. Secretin-enhanced MRCP (S-MRCP) provides additional insights into pancreatic function and offers advantages over standard MRCP in diagnosing various pancreatic-related conditions. However, its use is not widespread due to practical considerations such as increased cost and examination time.
S-MRCP has established indications, including conditions like pancreas divisum, anomalous pancreaticobiliary junction, Santorinicele, Wirsungocele, chronic pancreatitis, main pancreatic duct stenosis, and assessment of complex postoperative anatomy. Interpretation of S-MRCP images involves assessing pancreatic duct morphology, anatomic variants, and cystic lesions communicating with the ducts. Dynamic changes in the main pancreatic duct dilation after secretin administration are analyzed, providing valuable information for diagnosis and treatment planning.
Anatomy of pancreas
The pancreas, situated in the abdominal region, lies behind the stomach and plays a vital role in both the digestive and endocrine systems. Its structure can be divided into three main parts: the head, body, and tail. The head is located on the right side and is connected to the duodenum, while the body extends to the left and ends at the tail. The pancreas consists of two types of cells: exocrine and endocrine. The exocrine cells release digestive enzymes into the pancreatic ducts, which eventually merge with the common bile duct and enter the duodenum to aid in digestion. On the other hand, the endocrine cells form clusters known as islets of Langerhans and produce hormones like insulin and glucagon, essential for regulating blood sugar levels. The complex structure of the pancreas facilitates its crucial functions in digestion and hormonal balance within the body.

Contraindications
- Any electrically, magnetically or mechanically activated implant (e.g. cardiac pacemaker, insulin pump biostimulator, neurostimulator, cochlear implant, and hearing aids)
- Intracranial aneurysm clips (unless made of titanium)
- Pregnancy (risk vs benefit ratio to be assessed)
- Ferromagnetic surgical clips or staples
- Metallic foreign body in the eye
- Metal shrapnel or bullet
Patient preparation for Secretin Stimulated MRCP
- A satisfactory written consent form must be taken from the patient before entering the scanner room
- Ask the patient to remove all metal objects including keys, coins, wallet, cards with magnetic strips, jewellery, hearing aid and hairpins
- Ask the patient to undress and change into a hospital gown
- Instruct the patient to hold their breath for the breath hold scans and breathe gently for the gated scans (its advisable to coach the patient two to three times before starting the scan)
- Claustrophobic patients may be accompanied into the scanner room e.g. by staff member or relative with proper safety screening
- An intravenous line must be placed with extension tubing extending out of the magnetic bore
- Patients should fast for 4 -6 hours before the exam (nothing to eat or drink)
- Offer headphones for communicating with the patient and ear protection
- Explain the procedure to the patient and answer questions
- Note down the weight of the patient
Positioning for Secretin Stimulated MRCP scan
- Position the patient in supine position with head pointing towards the magnet (head first supine)
- Position the patient over the spine coil and place the body coil over the upper abdomen (nipple down to iliac crest)
- Securely tighten the body coil using straps to prevent respiratory artefacts
- Give a pillow under the head and cushions under the legs for extra comfort
- Centre the laser beam localizer over xiphoid process of sternum

Recommended Secretin Stimulated MRCP Protocols and Planning
localiser
To localize and plan the sequences, it is essential to acquire a three-plane T2 HASTE localizer initially. These fast single-shot localizers have an acquisition time of under 25 seconds and are highly effective in accurately localizing abdominal structures.
T2 HASTE coronal 4mm sfov breath hold
Plan the coronal slices using the axial localizer and position the block horizontally across the abdomen as shown. Verify the position in the other two planes. Establish an appropriate angle in the sagittal plane, aligning it vertically across the abdomen. Ensure that the slices adequately cover the entire pancreas, extending from the anterior abdominal wall to the vertebral body. The phase direction should be from right to left to minimize ghosting artifacts from the lungs and heart. Employ phase oversampling to prevent wrap-around artifacts. Additionally, consider adding saturation bands at the top and bottom of the block to minimize artifacts caused by fat signal, arterial pulsation, and breathing. Instruct the patient to hold their breath during image acquisition. (In our department, we typically advise patients to take two deep breaths before instructing them to “take a deep breath and hold”.)

Parameters
TR 2000-2500 | TE 90-110 | FLIP 130 | NEX 1 | SLICE 4MM | MATRIX 256×256 | FOV 280 | PHASE R>L | OVERSAMPLE 50% | TRIGGER NO |
Small FOV T2 tse\HASTE fat saturated breath hold 4mm
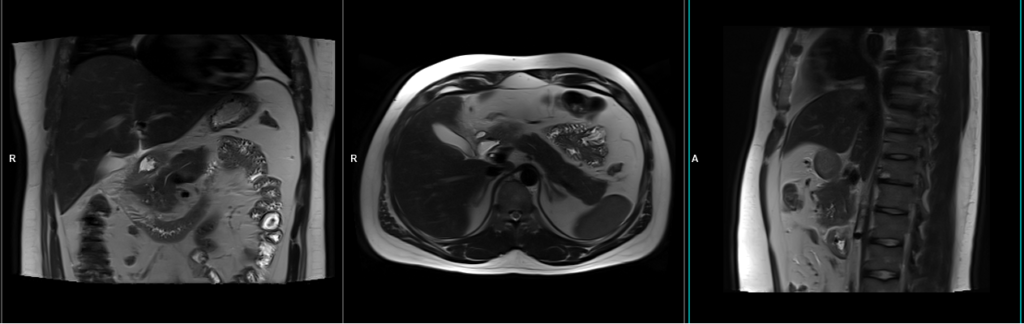
Plan the axial slices on the coronal breath-hold images and position the block horizontally across the abdomen as shown. Verify the positioning in the other two planes. Establish an appropriate angle in the sagittal plane, aligning it horizontally across the abdomen. The slices must be sufficient to cover the entire pancreas, starting one inch above the pancreatic tail and extending down to the C loop of the duodenum. The phase direction should be from right to left to minimize ghosting artifacts from the anterior abdominal wall. Use phase oversampling to prevent wrap-around artifacts. Consider adding saturation bands at the top and bottom of the block to minimize artifacts caused by fat signal, arterial pulsation, and breathing. Instruct the patient to hold their breath during image acquisition.

Parameters
TR 5000-6000 | TE 90 | FLIP 150 | NEX 1 | SLICE 3MM | MATRIX 256×192 | FOV 250 | PHASE A>P | OVERSAMPLE 30% | IPAT ON |
T2 tse\HASTE breath hold 4mm Small FOV
Plan the axial slices on the coronal breath-hold images and position the block horizontally across the abdomen as shown. Verify the positioning in the other two planes. Establish an appropriate angle in the sagittal plane, aligning it horizontally across the abdomen. The slices must be sufficient to cover the entire pancreas, starting one inch above the pancreatic tail and extending down to the C loop of the duodenum. The phase direction should be from right to left to minimize ghosting artifacts from the anterior abdominal wall. Use phase oversampling to prevent wrap-around artifacts. Consider adding saturation bands at the top and bottom of the block to minimize artifacts caused by fat signal, arterial pulsation, and breathing. Instruct the patient to hold their breath during image acquisition.
Note:Scans achieve better results when performed with a right-to-left phase direction and 70% oversampling. This choice is made to prevent artifacts caused by motion of the abdominal wall fat. However, in most scanners, implementing this option is not feasible due to the additional oversampling, which would extend the breath-hold time beyond what patients can manage. As a result, we conduct the scan with an anterior-posterior phase direction on our 1.5T scanner and right-to-left on our 3T scanner. If TSE images exhibit excessive artifacts, consider utilizing a HASTE sequence.
Parameters
TR 4000-5000 | TE 90 | FLIP 150 | NEX 1 | SLICE 4MM | MATRIX 256×224 | FOV 250 | PHASE A>P | OVERSAMPLE 30% | IPAT ON |
Planning must be done in the breath hold HASTE coronal because the diaphragm will push down the upper abdominal organs during inhalation and change the position of pancreas from the initial localizer scans.

T2 SPACE coronal 3D fat sat 1mm gated
Plan the coronal slices based on the axial images, angling the position parallel to the pancreatic body. Verify the position in the other two planes. Establish an appropriate angle in the sagittal plane, aligning it vertically across the abdomen. Ensure that the slices are sufficient to cover the entire pancreas from head to tail.
For respiratory gating scans, it is important to correctly position the respiratory navigator box. Place it in the middle of the right dome of the diaphragm, with half of the box over the right lobe of the liver (segment 8) and the other half over the lungs. Planning should be done using a non-breath-hold localizer, as the diaphragm will push down the liver during inhalation, leading to improper planning of slices and the respiratory navigator box.
It is important to instruct the patient to breathe gently throughout the sequence. The effectiveness of the navigator will be reduced with very shallow or erratic breathing.

Navigators:-
Recently, navigators have been introduced in order to enable motion-free scans of the abdomen and chest, eliminating the presence of artifacts caused by motion. A navigator is a periodic two-dimensional pulse that excites a group of spins, followed by a readout gradient along the long axis of the group to obtain a one-dimensional profile of the region of interest. This imaging sequence utilizes a low flip angle (10) to minimize signal saturation, and the abrupt change in signal intensity between the lungs and liver is utilized to determine the position of the diaphragm. The navigator pulse has a duration of approximately 20 milliseconds and is executed every 200 milliseconds. A scan acceptance window is determined based on preliminary pre-scan data, after which the actual scan acquisition begins. During each slice acquisition, the navigation box detects the position of the diaphragm, and imaging only takes place when the diaphragm falls within the acceptance window.
Parameters
TR 2500-3500 | TE 706 | FLIP 170 | NEX 1 | SLICE 1MM | MATRIX 256×256 | FOV 300 | PHASE R>L | OVERSAMPLE 100% | TRIGGER YES |
T1 VIBE DIXON 3mm axial BH pre GD(In-opposed phase and water sat)
Plan the axial slices on the coronal breath-hold images and position the block horizontally across the abdomen as shown. Verify the positioning in the other two planes. Establish an appropriate angle in the sagittal plane, aligning it horizontally across the abdomen. The slices must be sufficient to cover the entire pancreas, starting one inch above the pancreatic tail and extending down to the C loop of the duodenum. The phase direction should be from right to left to minimize ghosting artifacts from the anterior abdominal wall. Use phase oversampling to prevent wrap-around artifacts. Consider adding saturation bands at the top and bottom of the block to minimize artifacts caused by fat signal, arterial pulsation, and breathing. Instruct the patient to hold their breath during image acquisition.

Parameters
TR 6-7 | TE 2.39 4.77 | FLIP 10 | NXA 1 | SLICE 3 MM | MATRIX 288×256 | FOV 250-280 | PHASE A>P | OVERSAMPLE 20% | BH YES |
T2 HASTE thick 60mm breath hold coronal oblique(multi slab)
Plan the coronal oblique thick slabs on the axial T2 fat-saturated images; position the middle block horizontally across the pancreatic duct. Verify the position in the other two planes. Establish an appropriate angle in the sagittal plane, aligning it vertically across the abdomen. Ensure that the slice thickness adequately covers the entire pancreatic duct. Utilize phase oversampling to prevent wrap-around artifacts. Instruct the patient to hold their breath during image acquisition.
By following these steps, the multi-slab coronal blocks will generate radial images of the pancreas in under 15 seconds.

Parameters
TR 4000-6000 | TE 700 | FLIP 12 | NEX 2 | SLICE 60MM | MATRIX 384X384 | FOV 300 | PHASE R>L | OVERSAMPLE 50% | IPAT OFF |
Secretin stimulated pancreatography
Move the table out and instruct the patient to keep still. Inform the patient about potential side effects of secretin and emphasize the importance of holding their breath during the procedure (most breath holds are less than 5 seconds). The most common side effects include nausea, abdominal pain, vomiting, upset stomach, burning sensation in the stomach, and diarrhea. It is highly recommended to provide the patient with two glasses of pineapple juice or CO2 gas-producing crystals before administering the secretin injection. Using CO2 or pineapple juice as a negative contrast agent will reduce the interference of intestinal fluids on the visualization of the pancreaticobiliary system.
Secretin injection
Now, administer secretin intravenously according to the manufacturer’s recommended dose of 0.2 μg/kg body weight. However, please use the appropriate dose as recommended by your radiologist. After secretin injection, you can observe a progressive dilatation of the pancreatic duct within 2 to 9 minutes. The peak dilatation is typically achieved at 2 to 3 minutes after injection. Subsequently, the main pancreatic duct returns to its normal calibre as pancreatic juice flows out through the papilla and fills the duodenum. The best visualization of the duodenal lumen is observed at 6 to 9 minutes after secretin injection. It is crucial to acquire high-resolution multi-slab (40-60mm) HASTE sequences every 30 seconds following the injection up to 9 minutes.
T2 HASTE 60mm breath hold coronal (multi slab) 30 seconds
Plan the coronal oblique thick slabs on the axial T2 fat-saturated images; position the middle block horizontally across the pancreatic duct. Verify the position in the other two planes. Establish an appropriate angle in the sagittal plane, aligning it vertically across the abdomen. Ensure that the slice thickness adequately covers the entire pancreatic duct. Utilize phase oversampling to prevent wrap-around artifacts. Instruct the patient to hold their breath during image acquisition.
Parameters
TR 4000-6000 | TE 700 | FLIP 12 | NEX 2 | SLICE 60MM | MATRIX 384X384 | FOV 300 | PHASE R>L | OVERSAMPLE 50% | IPAT ON |
T2 HASTE 60mm breath hold coronal (multi slab) 1 minute
Plan the coronal oblique thick slabs on the axial T2 fat-saturated images; position the middle block horizontally across the pancreatic duct. Verify the position in the other two planes. Establish an appropriate angle in the sagittal plane, aligning it vertically across the abdomen. Ensure that the slice thickness adequately covers the entire pancreatic duct. Utilize phase oversampling to prevent wrap-around artifacts. Instruct the patient to hold their breath during image acquisition.
T2 HASTE 60mm breath hold coronal (multi slab) 1.30 minutes
Plan the coronal oblique thick slabs on the axial T2 fat-saturated images; position the middle block horizontally across the pancreatic duct. Verify the position in the other two planes. Establish an appropriate angle in the sagittal plane, aligning it vertically across the abdomen. Ensure that the slice thickness adequately covers the entire pancreatic duct. Utilize phase oversampling to prevent wrap-around artifacts. Instruct the patient to hold their breath during image acquisition.
T2 HASTE 60mm breath hold coronal (multi slab) 2 minutes
Plan the coronal oblique thick slabs on the axial T2 fat-saturated images; position the middle block horizontally across the pancreatic duct. Verify the position in the other two planes. Establish an appropriate angle in the sagittal plane, aligning it vertically across the abdomen. Ensure that the slice thickness adequately covers the entire pancreatic duct. Utilize phase oversampling to prevent wrap-around artifacts. Instruct the patient to hold their breath during image acquisition.
T2 HASTE 60mm breath hold coronal (multi slab) 2.30 minutes
Plan the coronal oblique thick slabs on the axial T2 fat-saturated images; position the middle block horizontally across the pancreatic duct. Verify the position in the other two planes. Establish an appropriate angle in the sagittal plane, aligning it vertically across the abdomen. Ensure that the slice thickness adequately covers the entire pancreatic duct. Utilize phase oversampling to prevent wrap-around artifacts. Instruct the patient to hold their breath during image acquisition.
T2 HASTE 60mm breath hold coronal (multi slab) 3 minutes
Plan the coronal oblique thick slabs on the axial T2 fat-saturated images; position the middle block horizontally across the pancreatic duct. Verify the position in the other two planes. Establish an appropriate angle in the sagittal plane, aligning it vertically across the abdomen. Ensure that the slice thickness adequately covers the entire pancreatic duct. Utilize phase oversampling to prevent wrap-around artifacts. Instruct the patient to hold their breath during image acquisition.
Optional Scans
T2 haste single slice dynamic coronal 60 mm 18 measurements
Plan the coronal oblique thick slab on the axial T2 HASTE images; position the block horizontally across the pancreatic duct. Verify the position in the other two planes. Establish an appropriate angle in the sagittal plane, aligning it vertically across the abdomen. Ensure that the slice thickness adequately covers the entire pancreatic duct. Utilize phase oversampling to prevent wrap-around artifacts. Instruct the patient to hold their breath during image acquisition.

A dynamic T2 HASTE sequence comprises 18 high-resolution single-shot thick slab (60mm) HASTE scans, with a 25-second delay between each scan. The first scan is performed after 30 seconds, and the last one is taken at 9 minutes. It is crucial to provide appropriate breathing instructions during each scan. Instruct the patient to breathe normally after each scan, and then ask them to hold their breath when there are about 4 seconds left for the next scan. Repeat this breathing pattern for all 18 scans.
Parameters
TR 5000-6000 | TE 700 | FLIP 10 | NEX 1 | SLICE 60 mm | MATRIX 384X320 | FOV 300 | PHASE R>L | DYNAMIC 20 SCANS | IPAT ON |
CLICK THE SEQUENCES BELOW TO CHECK THE SCANS
- localizer_3 plane1
- T2_TRUFI_CORONAL-3MM2
- T1_TSE_AXIAL_BH_3MM3
- T2_TSE_AXIAL_ FAT SAT_BH_3MM4
- T2_SPACE 3D 0.6MM_GATED_3MM5
- T1_VIBE-FAT SAT_AXIAL_3MM6
- T2_HASTE_60MM_CORONAL OBL PRE7
- SECRETIN INJECTION

- T2_HASTE_60MM_CORONAL OBL 30 SEC8
- T2_HASTE_60MM_CORONAL OBL 60 SEC9
- T2_HASTE_60MM_CORONAL OBL 90 SEC10
- T2_HASTE_60MM_CORONAL OBL 120 SEC11
- T2_HASTE_60MM_CORONAL OBL 150 SEC12
- T2_HASTE_60MM_CORONAL OBL 180 SEC13
- T2_HASTE_60MM_CORONAL OBL 210 SEC14
- T2_HASTE_60MM_CORONAL OBL 240 SEC15